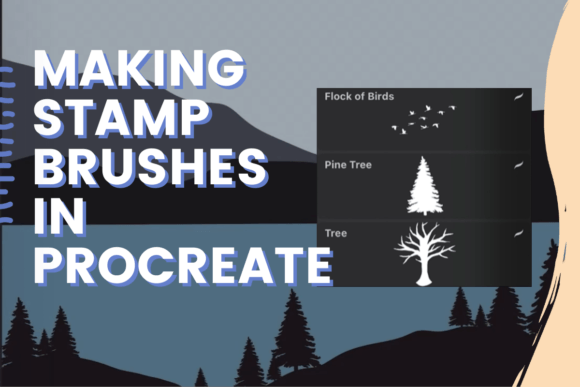
Making Stamp Brushes in Procreate
Whether you're an illustrator, a designer, or someone who loves to create digital art, having the right tools can make all the difference. One of the most time-saving and creative tools in Procreate is the stamp brush. These brushes allow you to reuse shapes and patterns with ease, making your workflow more efficient and your artwork more consistent. In this guide, we’ll walk through how to make stamp brushes in Procreate, specifically focusing on creating tree and bird stamp brushes. By the end, you’ll have a set of custom brushes that you can use in your own designs, whether for illustrations, patterns, or even animations.
Why Use Stamp Brushes?
Stamp brushes are not just convenient—they’re essential for anyone who wants to streamline their creative process. When you’re working on a project that requires repetitive elements, such as leaves on a tree or birds in a scene, drawing each one individually can be tedious. With a stamp brush, you can simply tap the brush onto your canvas and instantly apply the same shape in different positions. This not only saves time but also ensures consistency in your work.
Moreover, stamp brushes are incredibly versatile. They can be used for everything from background textures to intricate details. If you're working on a large illustration, using a stamp brush can help you maintain a cohesive look without spending hours on repetitive tasks. Plus, they give you more control over the placement and scale of your elements, allowing for greater creativity and precision.
Getting Started with Making Stamp Brushes in Procreate
Before you dive into creating your first stamp brush, it’s important to understand the basics of how Procreate handles brushes. Procreate allows you to create custom brushes by using a reference image, which serves as the base for your brush shape. Once you’ve created your reference image, you can convert it into a stamp brush, which can then be used like any other brush in the app.
Let’s start by outlining the steps involved in making a stamp brush:
- Create or select a reference image that will serve as your stamp.
- Adjust the image to fit your desired size and style.
- Convert the image into a stamp brush within Procreate.
- Test and refine your brush to ensure it works as intended.
- Save and organize your new stamp brushes for easy access.
Each step is crucial to ensuring that your stamp brush functions properly. Let’s explore each one in detail.
Creating Your Reference Image
The foundation of any stamp brush is the reference image. This is the actual shape or pattern you want to repeat throughout your artwork. For our example, we’ll be creating a tree stamp and a bird stamp. Both require a clear, well-defined image that can be easily recognized when applied repeatedly.
When selecting or creating your reference image, consider the following:
- Clarity: The image should be sharp and detailed enough to be recognizable when scaled down.
- Consistency: The shape should remain consistent across different sizes and placements.
- Simplicity: Avoid overly complex designs that may lose detail when repeated.
- Color: Choose colors that complement your overall design and are easy to work with.
If you’re unsure where to start, you can sketch your design directly in Procreate or import an image from your device. Either way, the key is to ensure that your reference image is clean and ready for conversion.
Converting Your Image into a Stamp Brush
Once you have your reference image ready, the next step is to convert it into a stamp brush. This process involves using Procreate’s built-in tools to transform your image into a functional brush. Here’s how you can do it:
1. Open your reference image in Procreate.
2. Tap the Brush button at the bottom of the screen.
3. Tap the Brush Settings icon (the gear symbol).
4. Scroll down and tap Make Stamp.
5. Adjust the settings as needed, including the size, spacing, and opacity.
6. Tap Done to save your new stamp brush.
After converting your image into a stamp brush, you can test it out by applying it to your canvas. This is a great opportunity to see how it looks in different contexts and make any necessary adjustments.
Refining Your Stamp Brush
Not every stamp brush will be perfect on the first try. It’s important to experiment with different settings and adjust your reference image as needed. Some common adjustments include changing the size of the stamp, adjusting the spacing between repetitions, and tweaking the opacity to match your design.
If you find that your stamp brush isn’t working as expected, don’t worry—this is part of the process. You can always go back to your reference image and make changes before converting it again. The goal is to create a stamp that feels natural and intuitive when used in your artwork.
For example, if your tree stamp appears too small or too large, you can resize it in the brush settings. If the spacing between trees is inconsistent, you can adjust the spacing parameter to achieve a more uniform look. These small tweaks can make a big difference in the final result.
Using Your Custom Stamp Brushes
Once your stamp brushes are ready, you can use them just like any other brush in Procreate. Simply tap the Brush button, select your custom stamp, and start applying it to your canvas. As you work, you’ll notice how much faster and more efficient your workflow becomes.
One of the best things about stamp brushes is their versatility. You can use them for backgrounds, foregrounds, textures, and even as part of larger compositions. For instance, you could use a tree stamp to quickly fill in a forest scene or a bird stamp to add movement to a sky full of flying creatures.
Additionally, stamp brushes can be combined with other brushes to create more complex designs. For example, you might use a tree stamp for the main elements and then add details with a pencil or ink brush. This approach allows you to maintain consistency while still adding depth and variation to your artwork.
Organizing and Saving Your Stamp Brushes
As you create more stamp brushes, it’s important to keep them organized so you can easily access them when needed. Procreate allows you to create custom brush sets, which can be saved and shared with others. Here’s how to organize your stamp brushes:
1. Go to the Brush menu.
2. Tap the Brush Sets icon.
3. Tap New Set to create a new folder for your stamps.
4. Select the brushes you want to add and tap Add to Set.
5. Name your set and save it for future use.
By organizing your stamp brushes into separate sets, you can keep your workspace tidy and ensure that you always have the right tools at your fingertips. This is especially useful if you work on multiple projects that require different types of stamps.
Conclusion
Making stamp brushes in Procreate is a powerful technique that can significantly enhance your creative workflow. Whether you're creating trees, birds, or any other repeating elements, custom stamp brushes allow you to work faster, more efficiently, and with greater precision. By following the steps outlined in this guide, you can create your own set of stamp brushes tailored to your unique artistic needs.